

Appearance
Mandates
This section helps you explain how counterparties can complete a NACH Direct Debit (DD) mandate request using the portal.
A mandate request is initiated by your Client and counterparties will receive the request and must complete the following actions.
Key actions
- Check payee ( Client ) & update payer ( Counterparty ) details
- Enter and validate bank account details
- Review mandate summary
- Download, sign & upload the NACH form
Mandate list
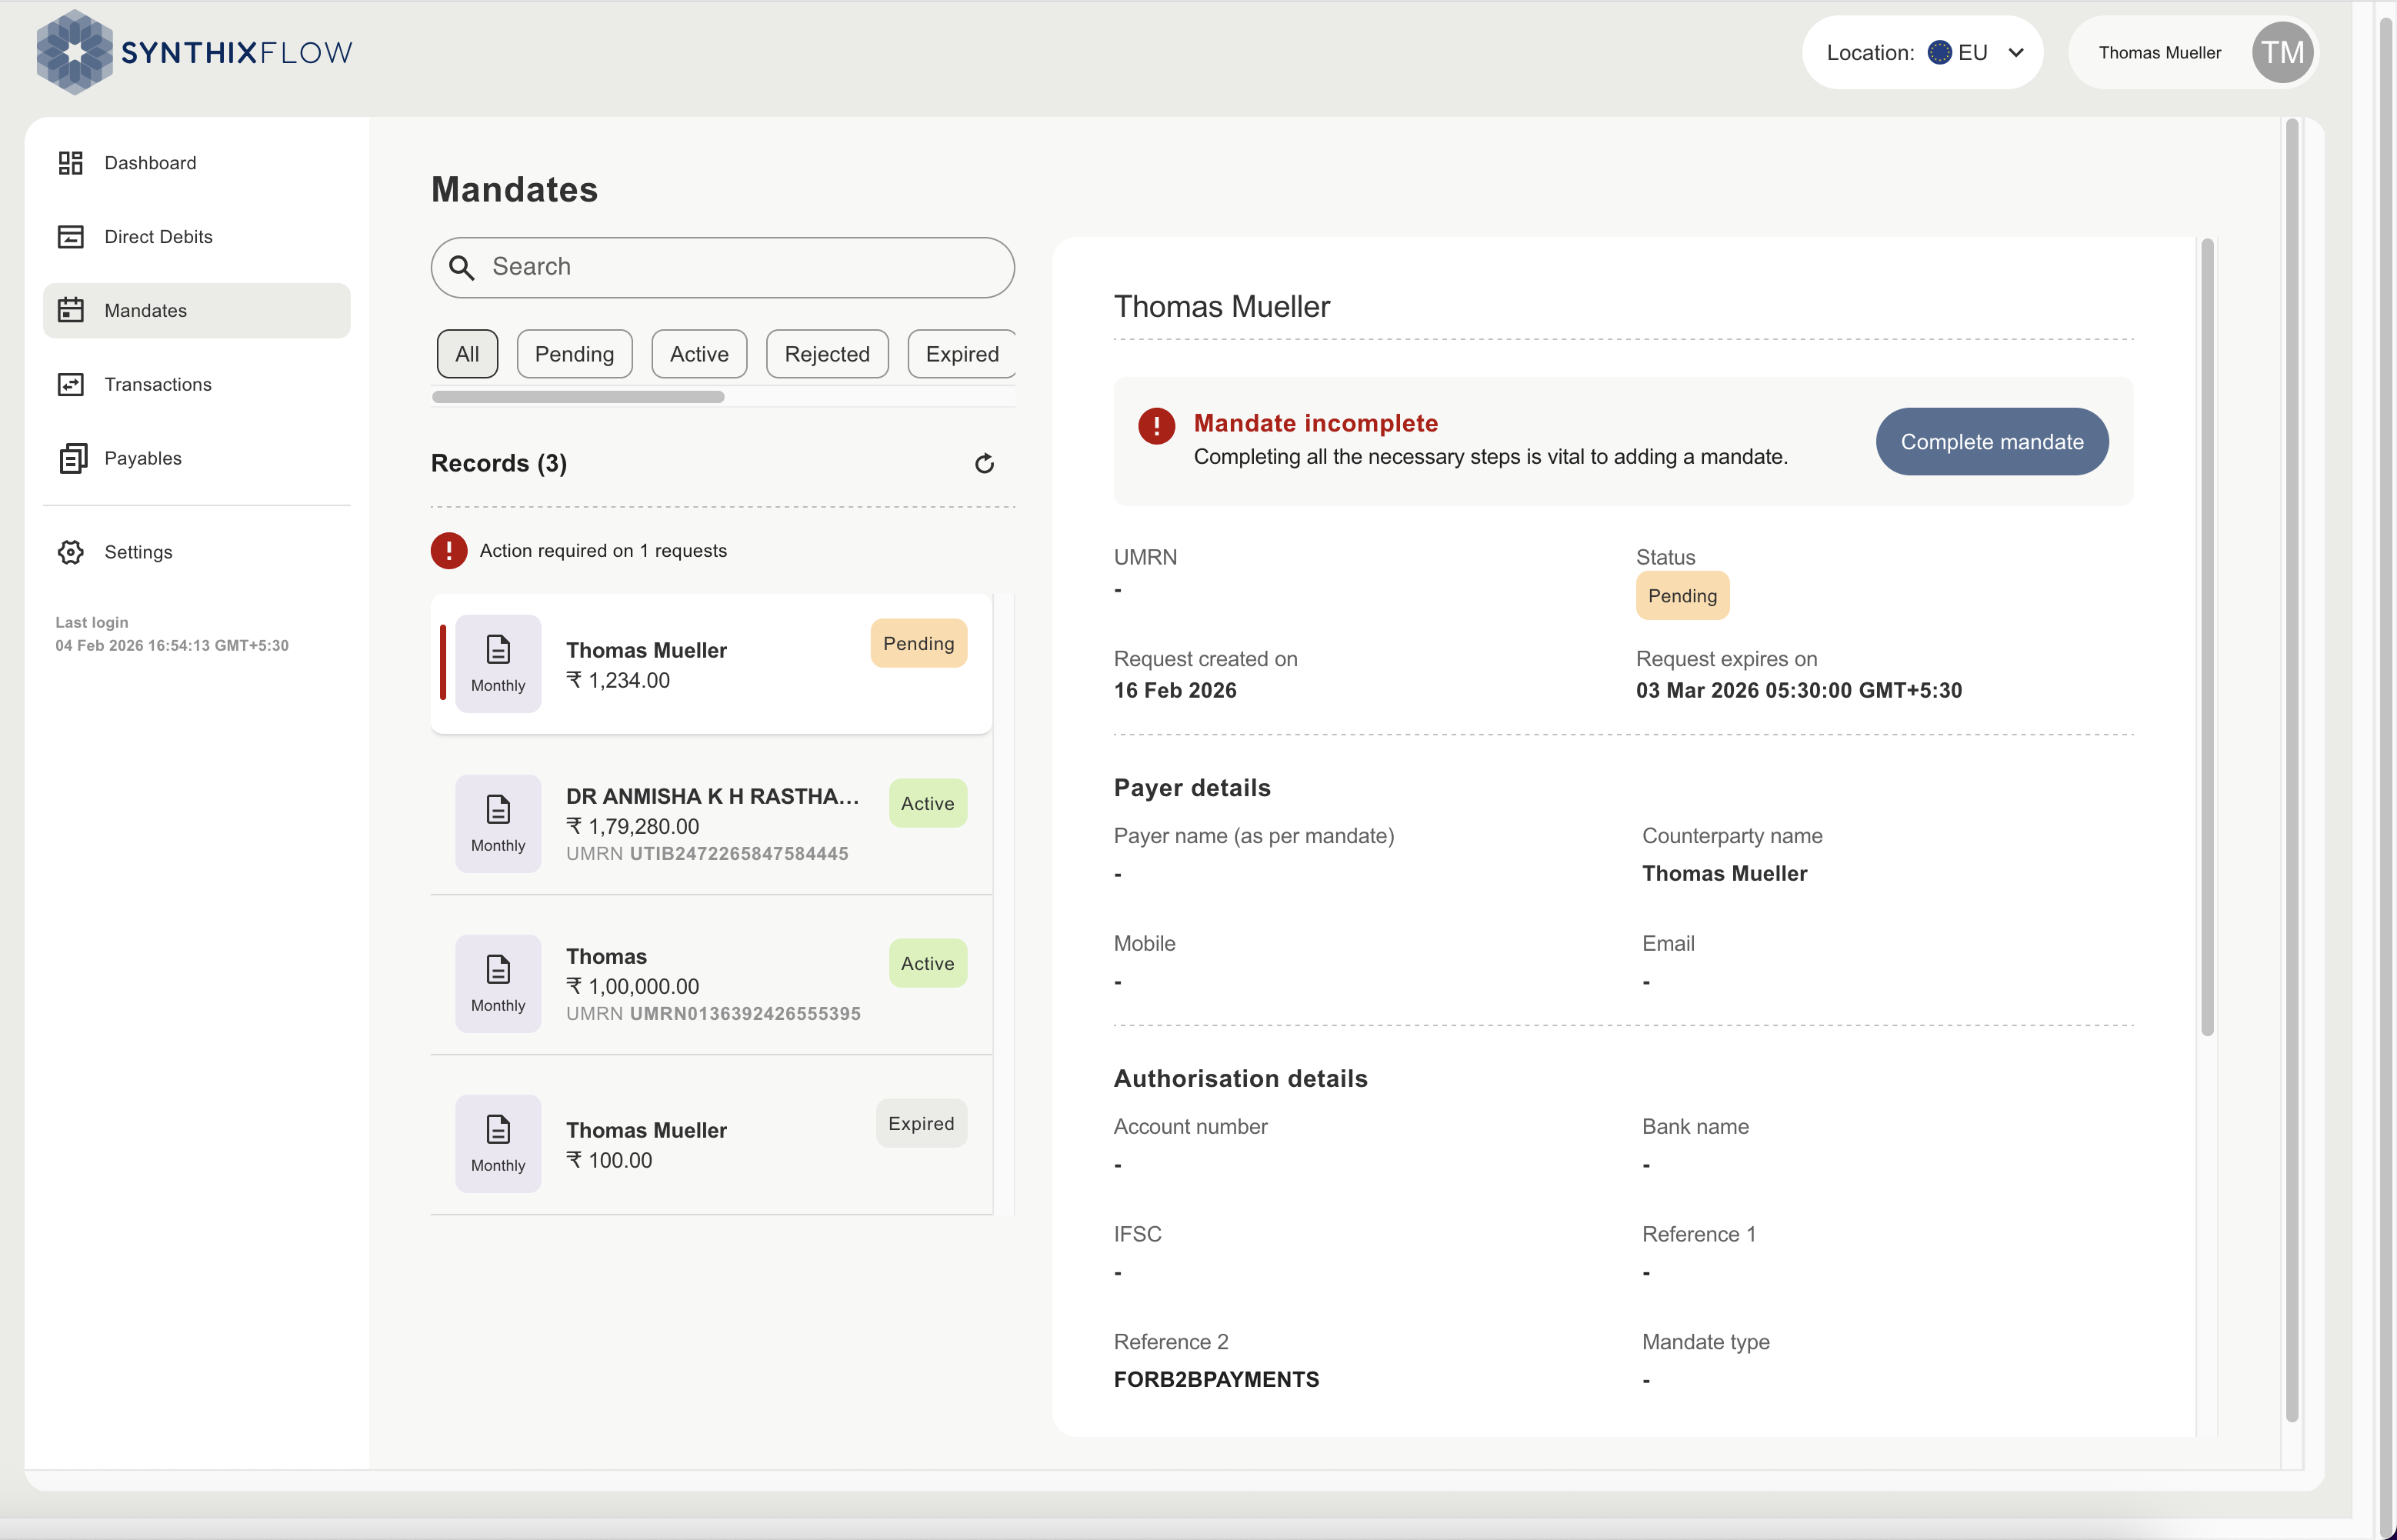
The section will provide overview of all states of Mandates - Pending, Active, Rejected, Expired. The filters and search bar can be used to select the mandates based on the statuses.
Select the Mandate with "Pending" status and click on button "Complete Mandate"
Mandate creation
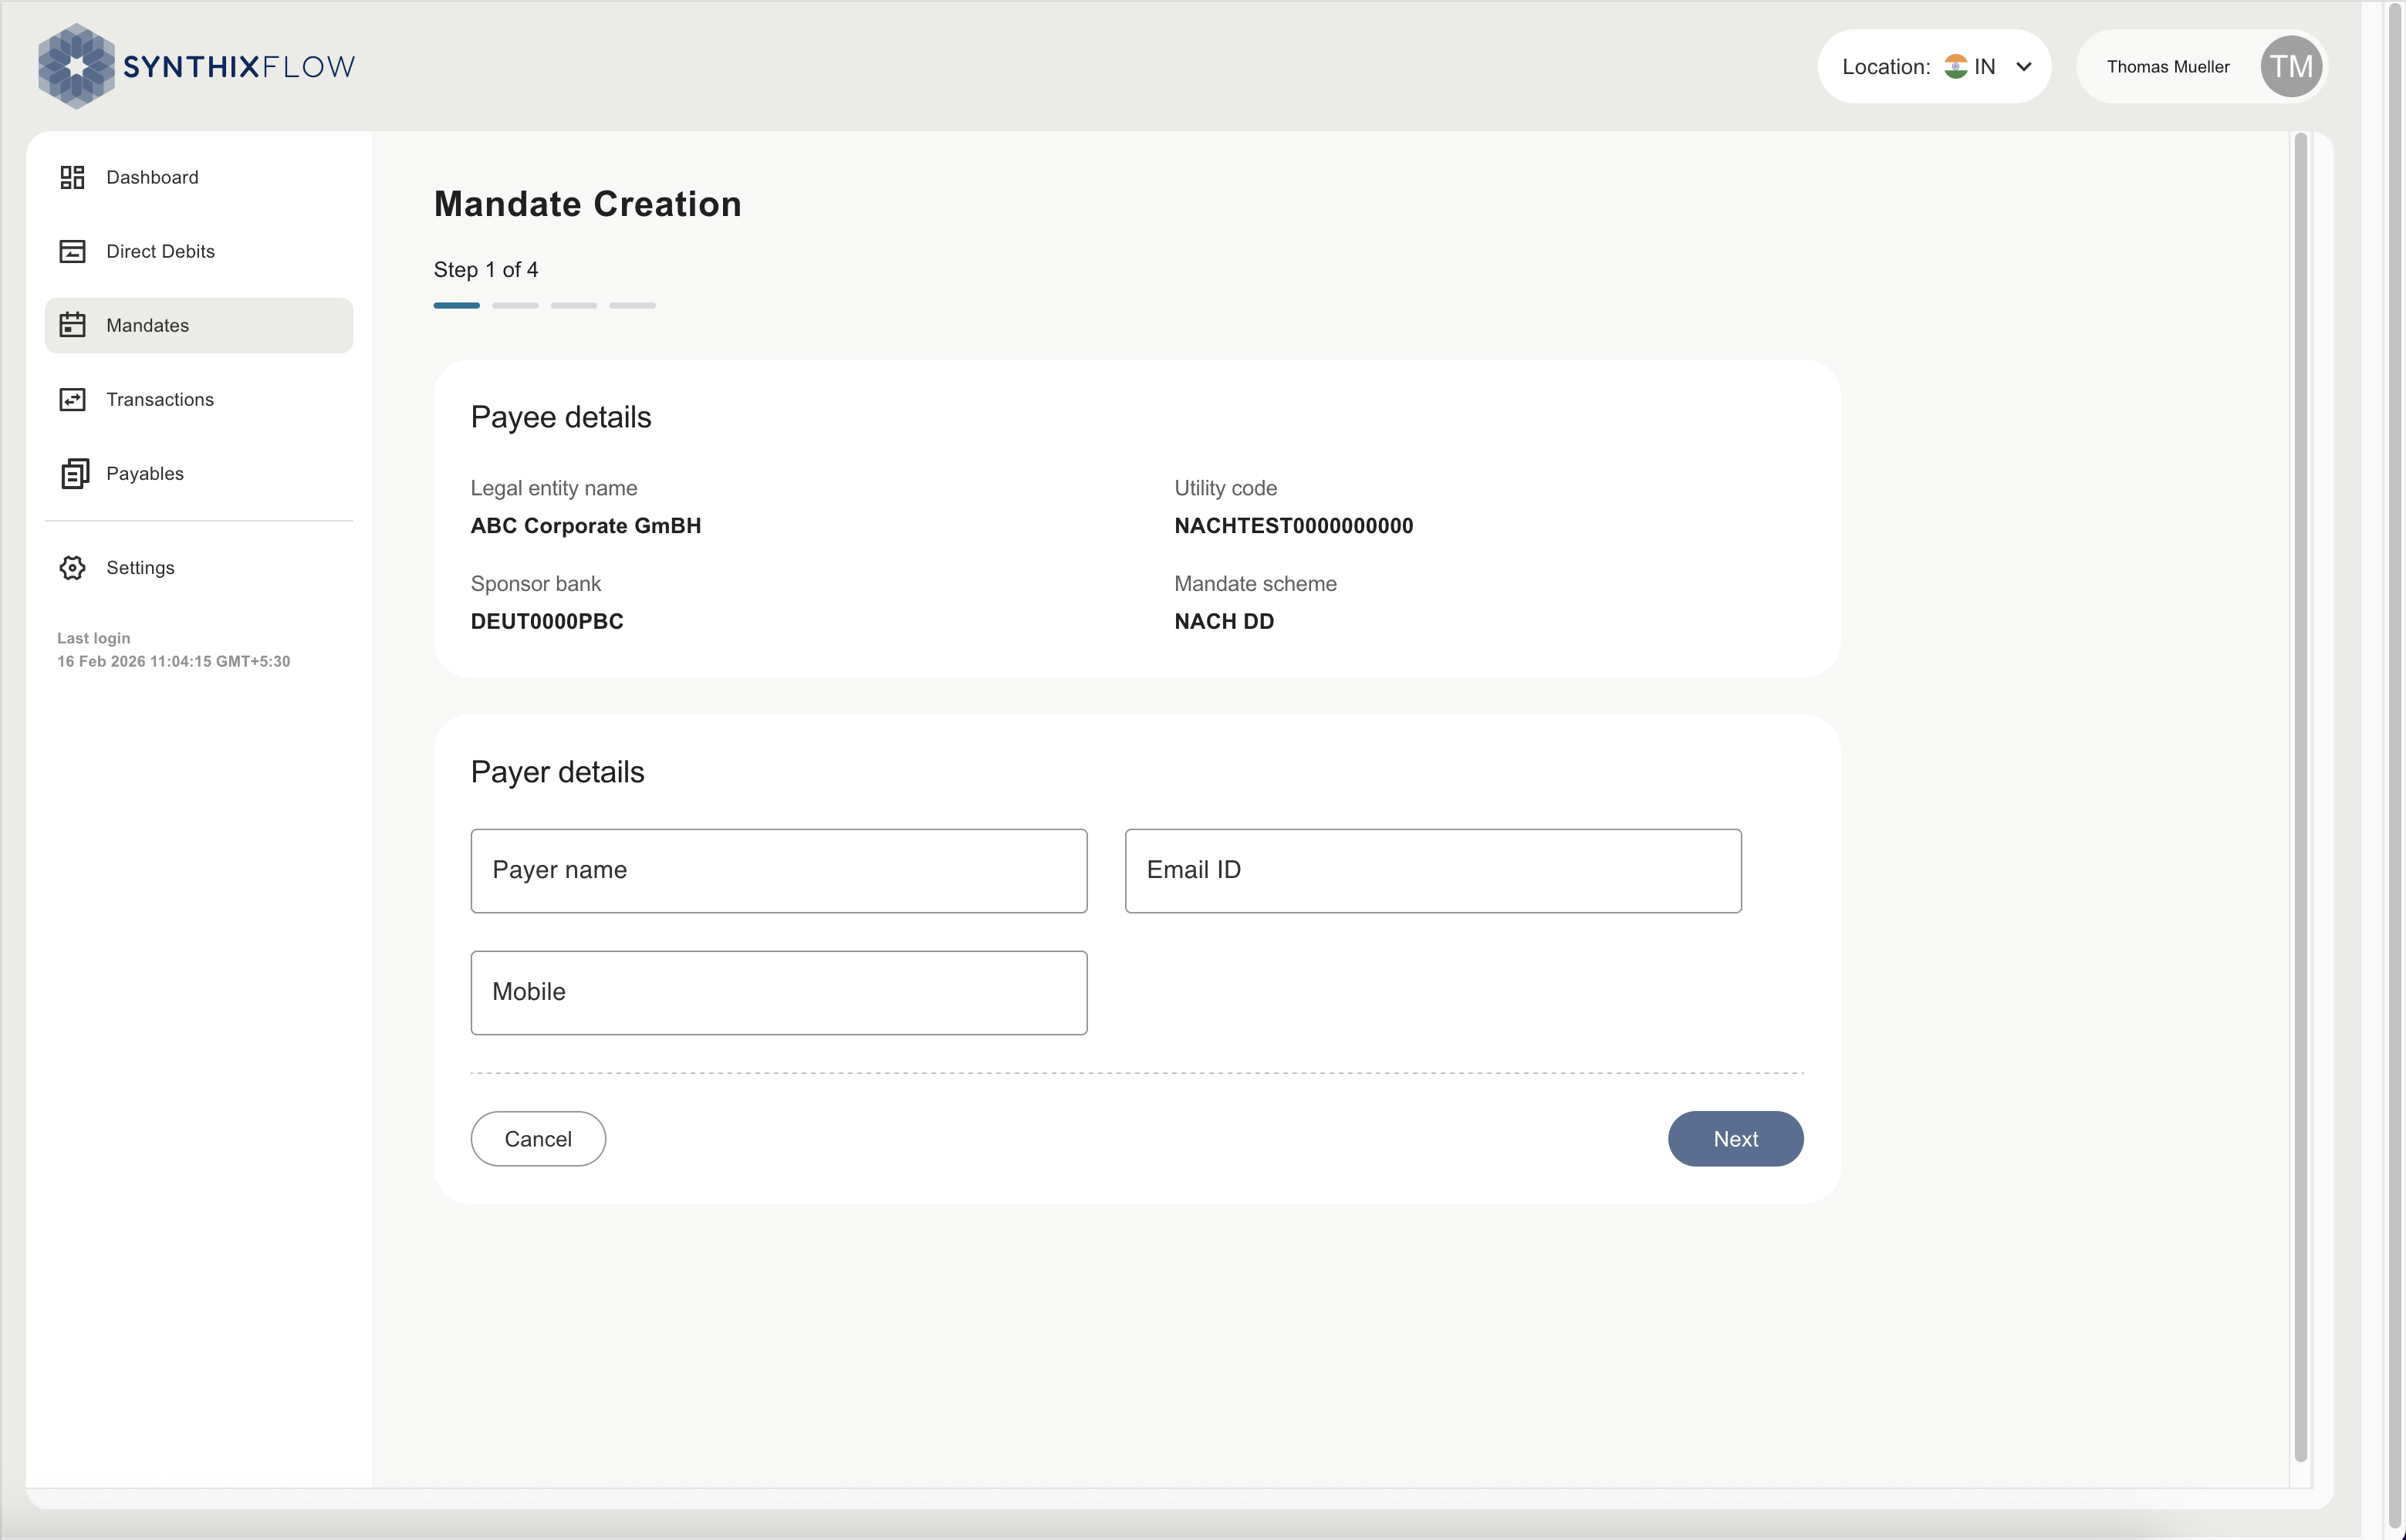
The screen displays auto‑filled payee details (client initiating the debit) and empty payer fields (counterparty completing the mandate), to be updated.
- Payer name
- Email ID
- Mobile number
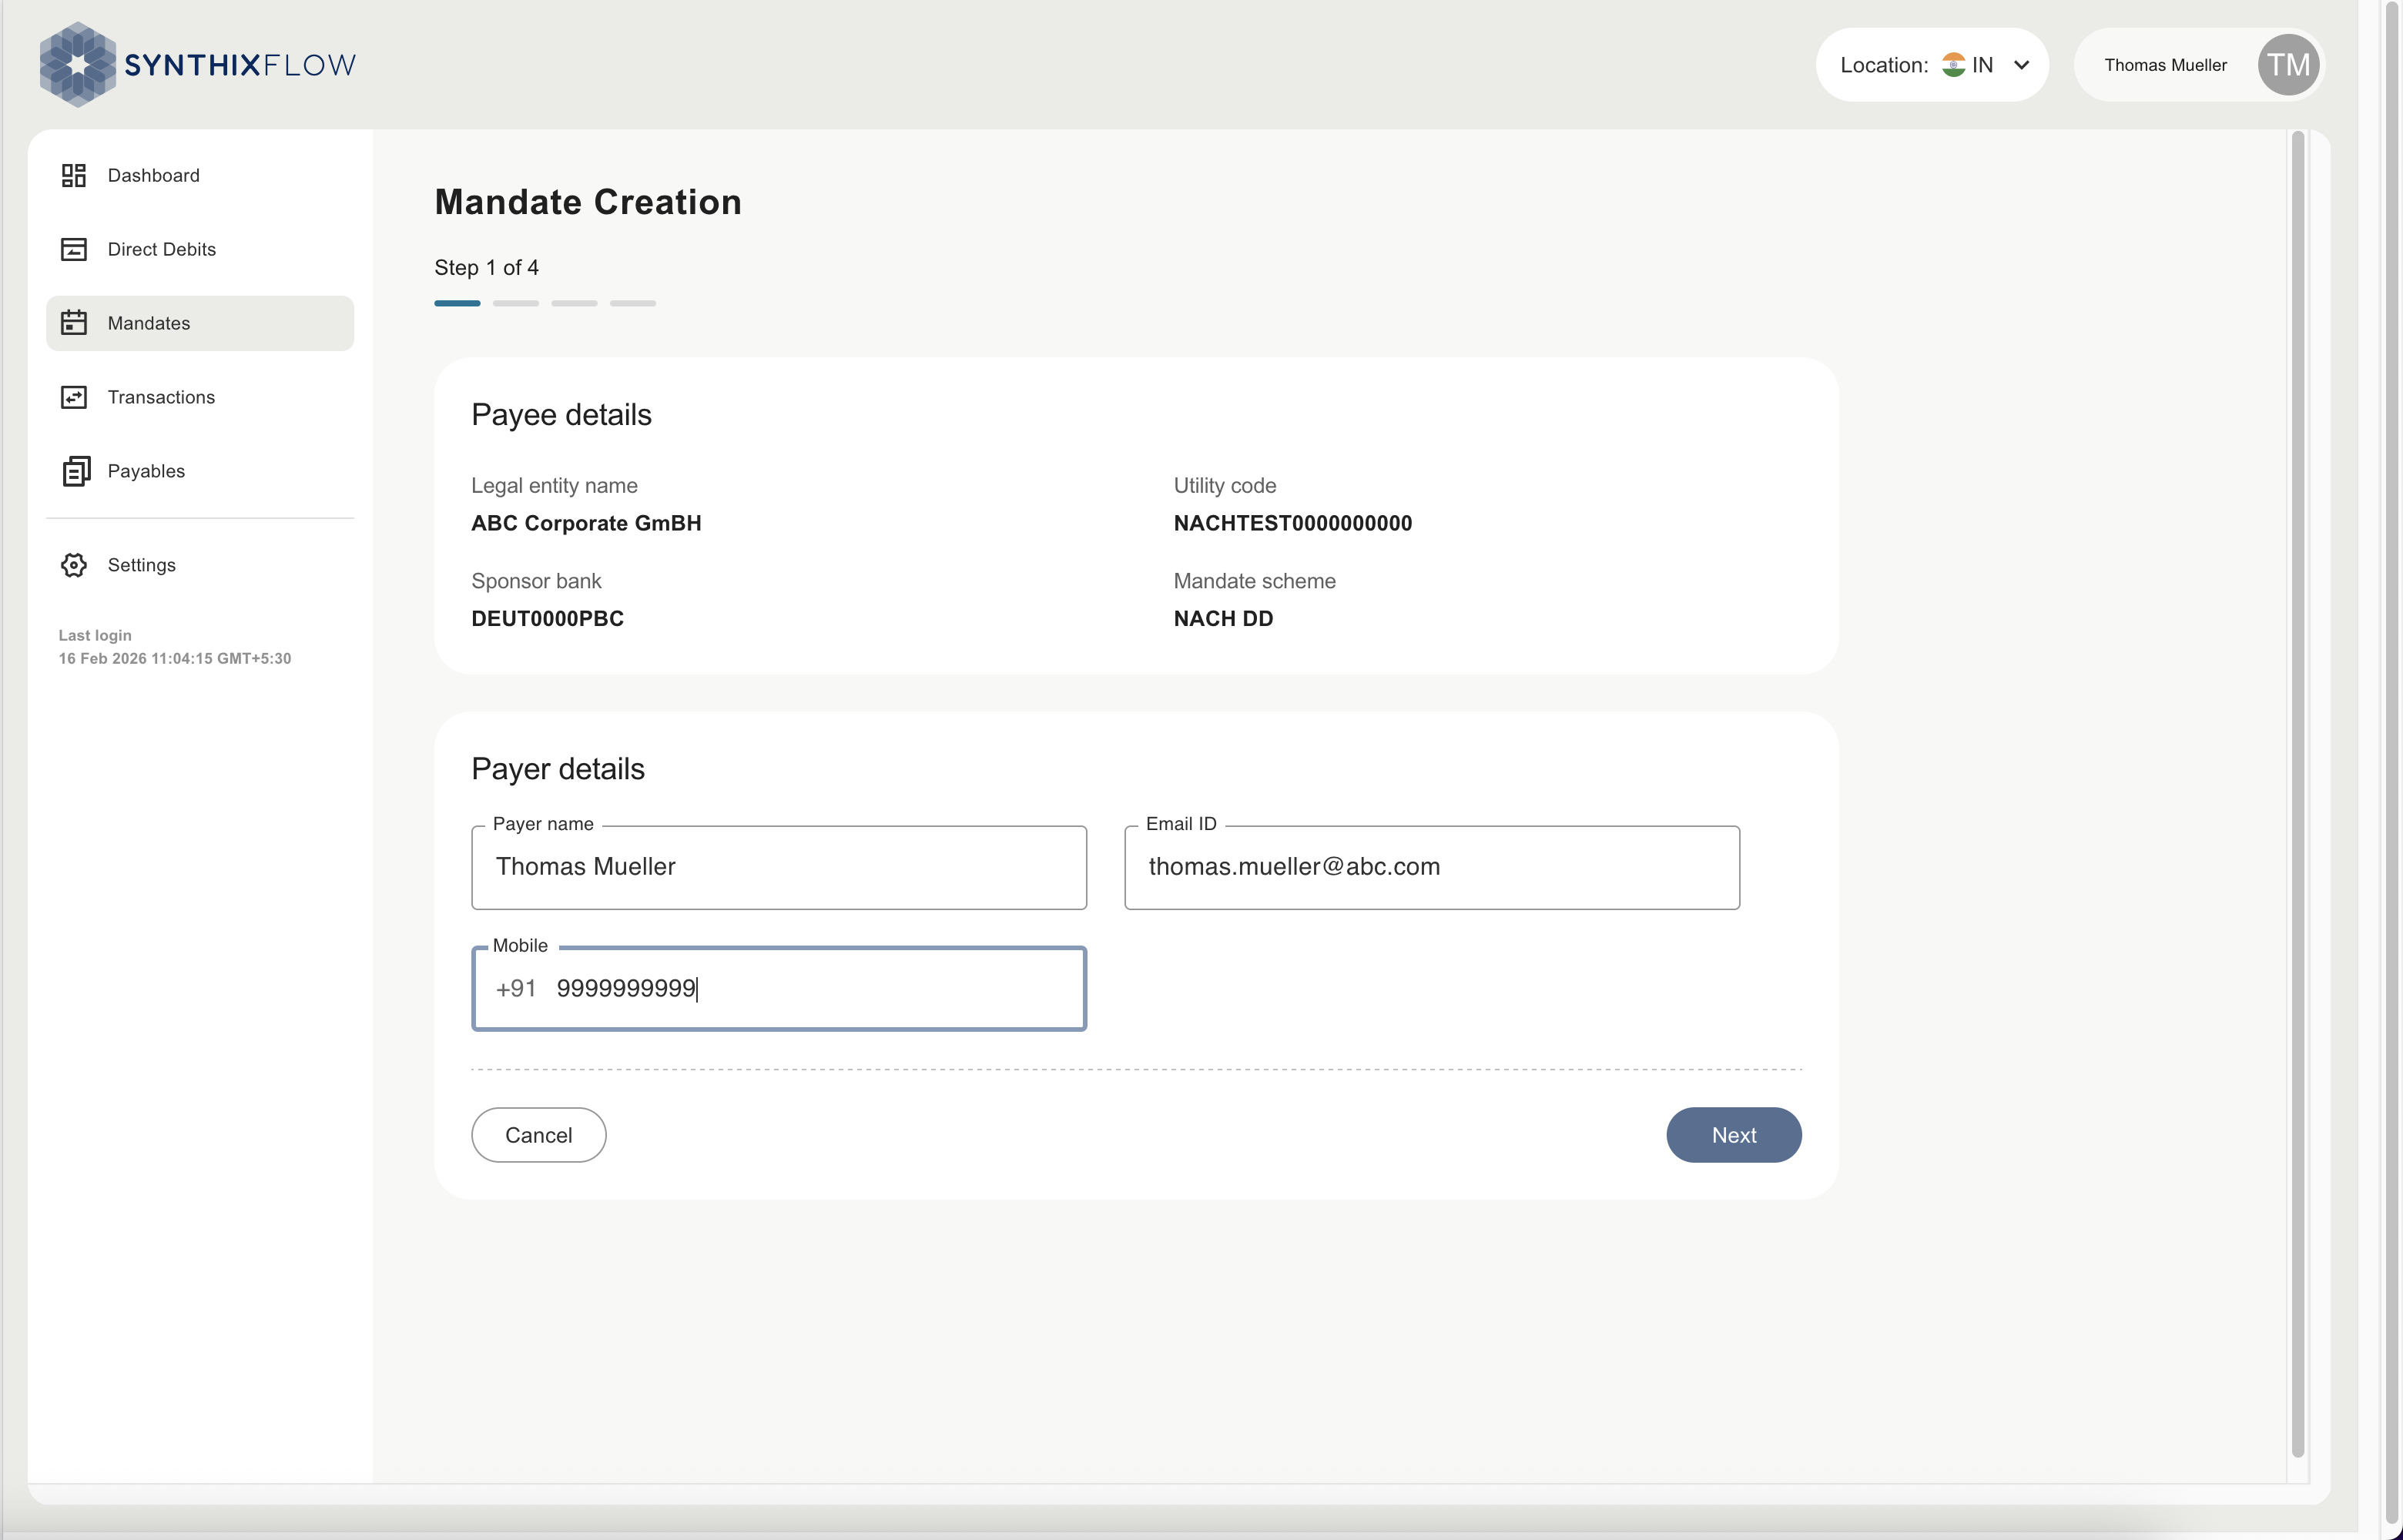
After filling the details, click Next.
Bank details
In this step, the counterparty enters the bank account information that will be used for debit instructions.
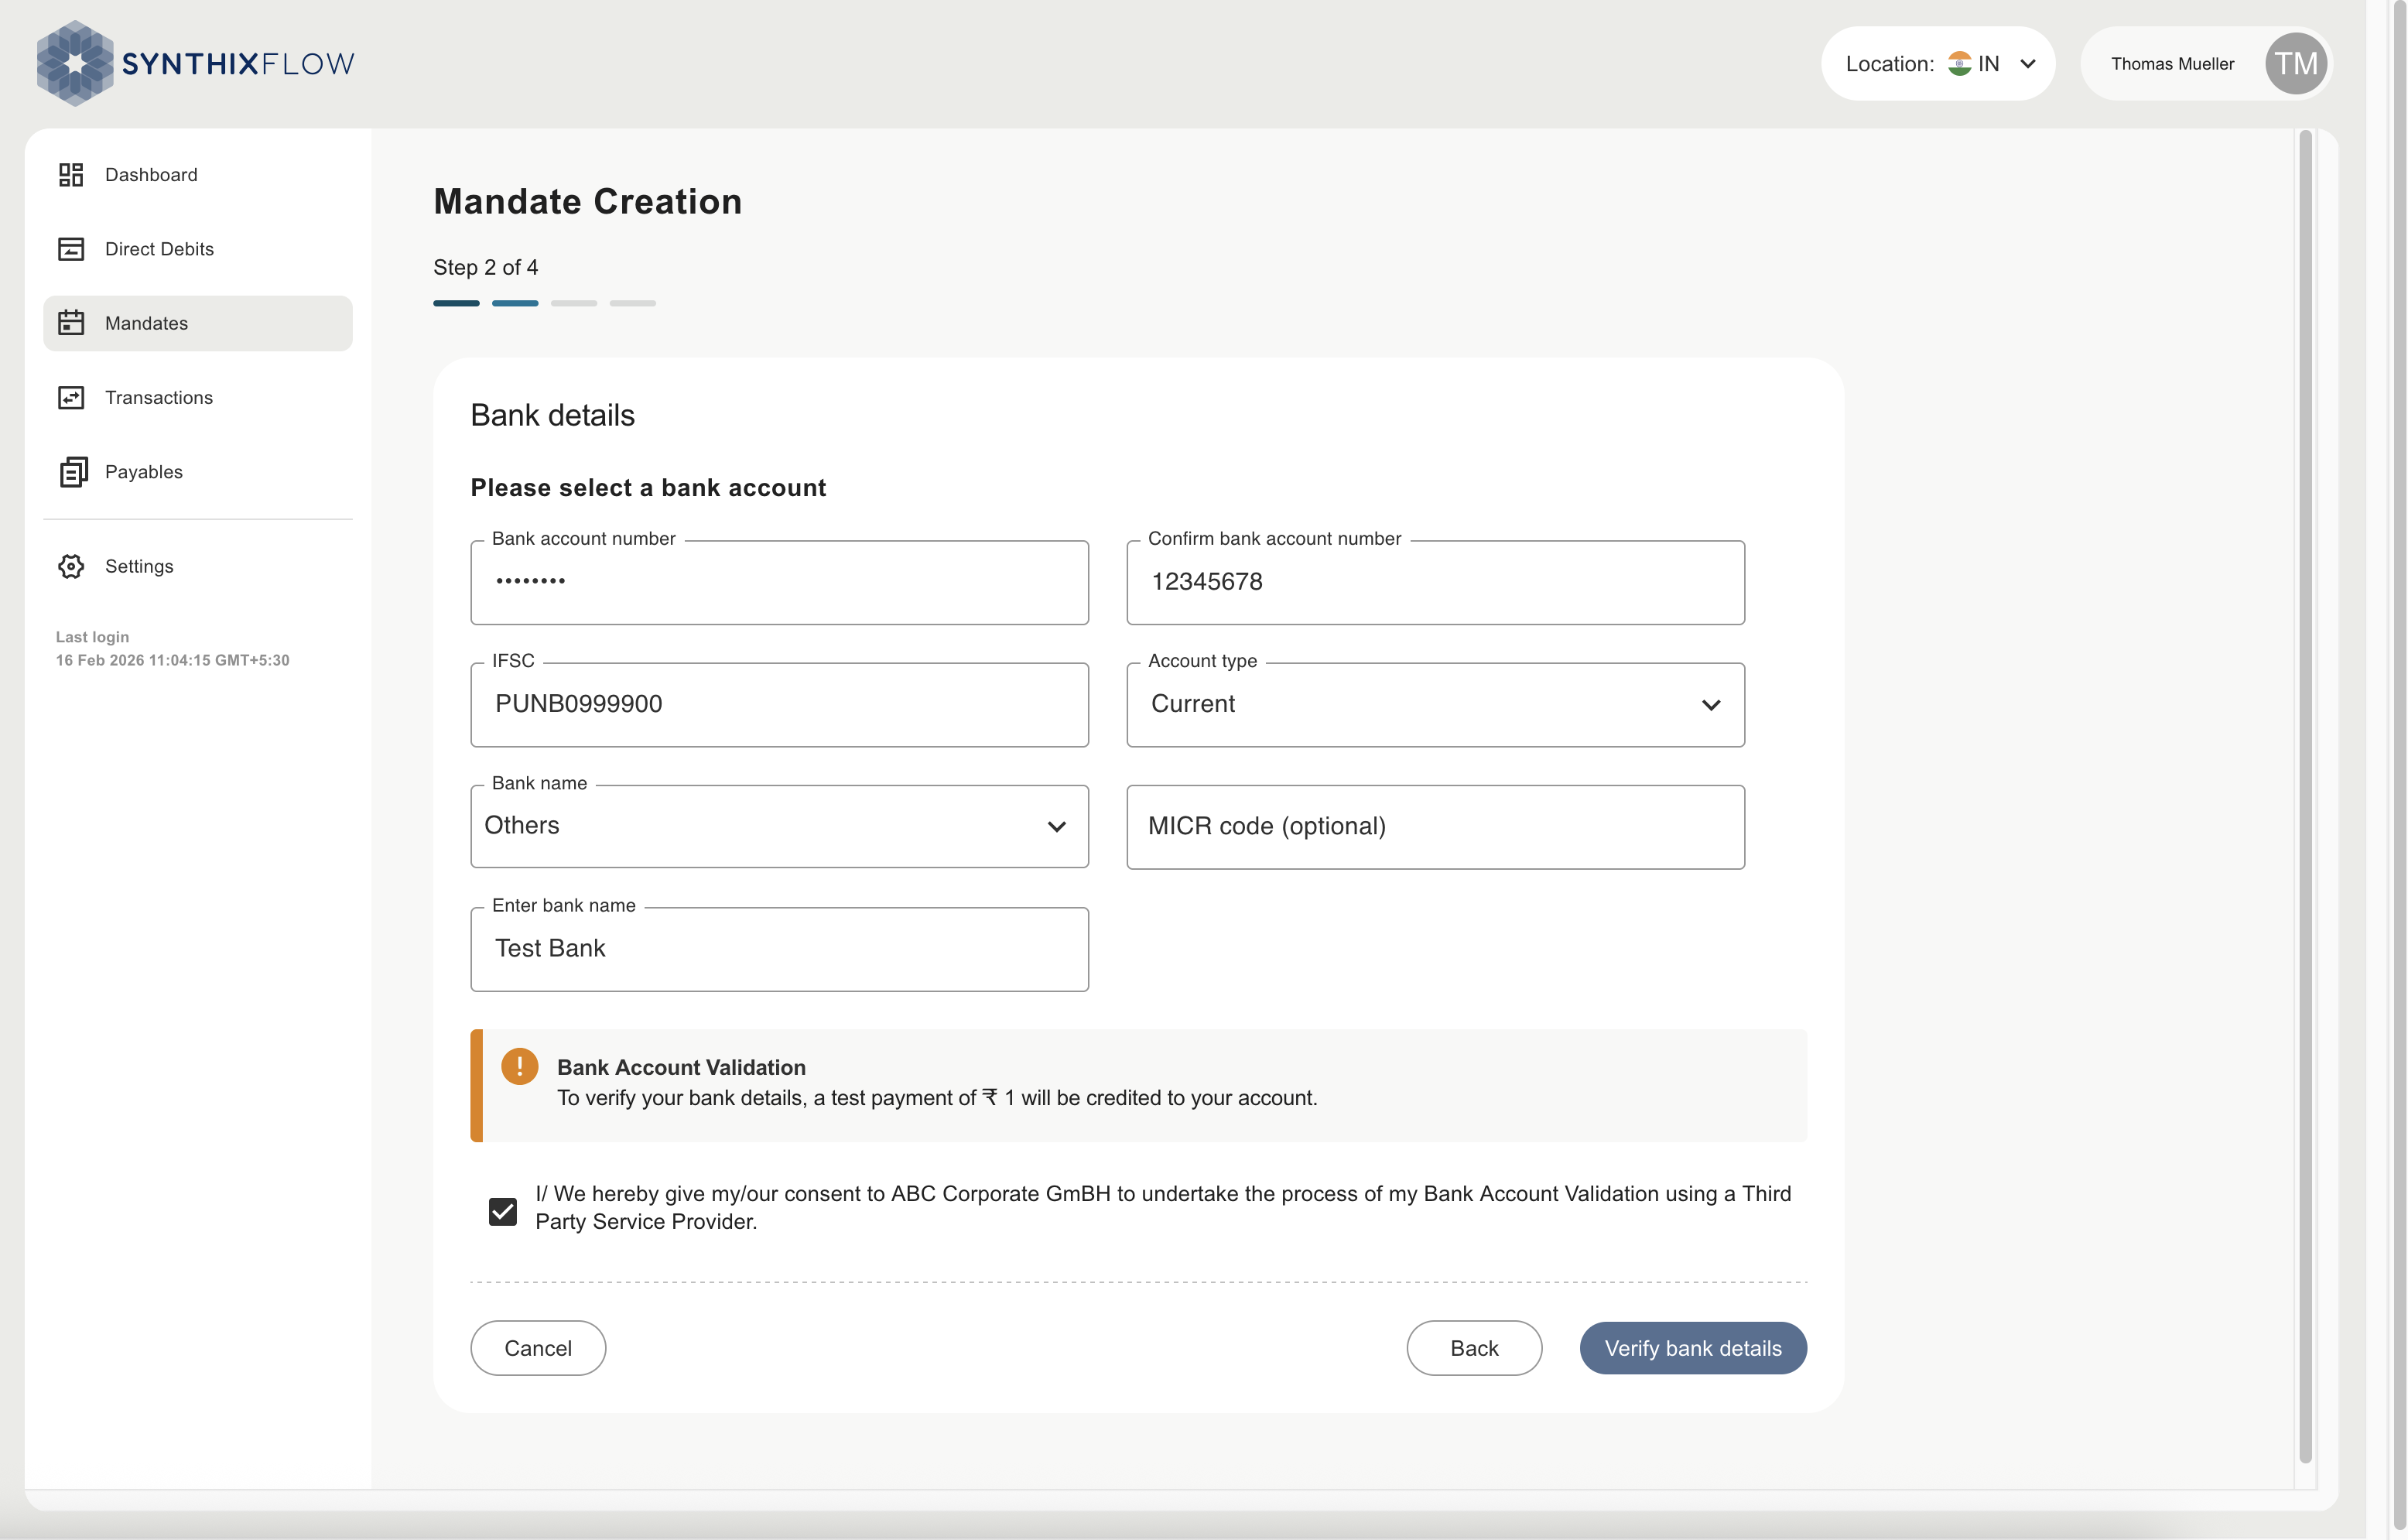
- Account Number
- Confirm Account Number
- Account type (Savings / Current)
- IFSC
- Bank Name
- Branch Name
- MICR (optional)
INFO
✔️ Bank Account Validation : A mandatory validation step requires the user to allow a ₹1 test deposit.
Please select the checkbox to provide consent for Bank Account Validation using a Third Party Service Provider.
Click Verify bank details to initiate the validation.
Summary
Once validation is complete, a green Account verified badge appears.
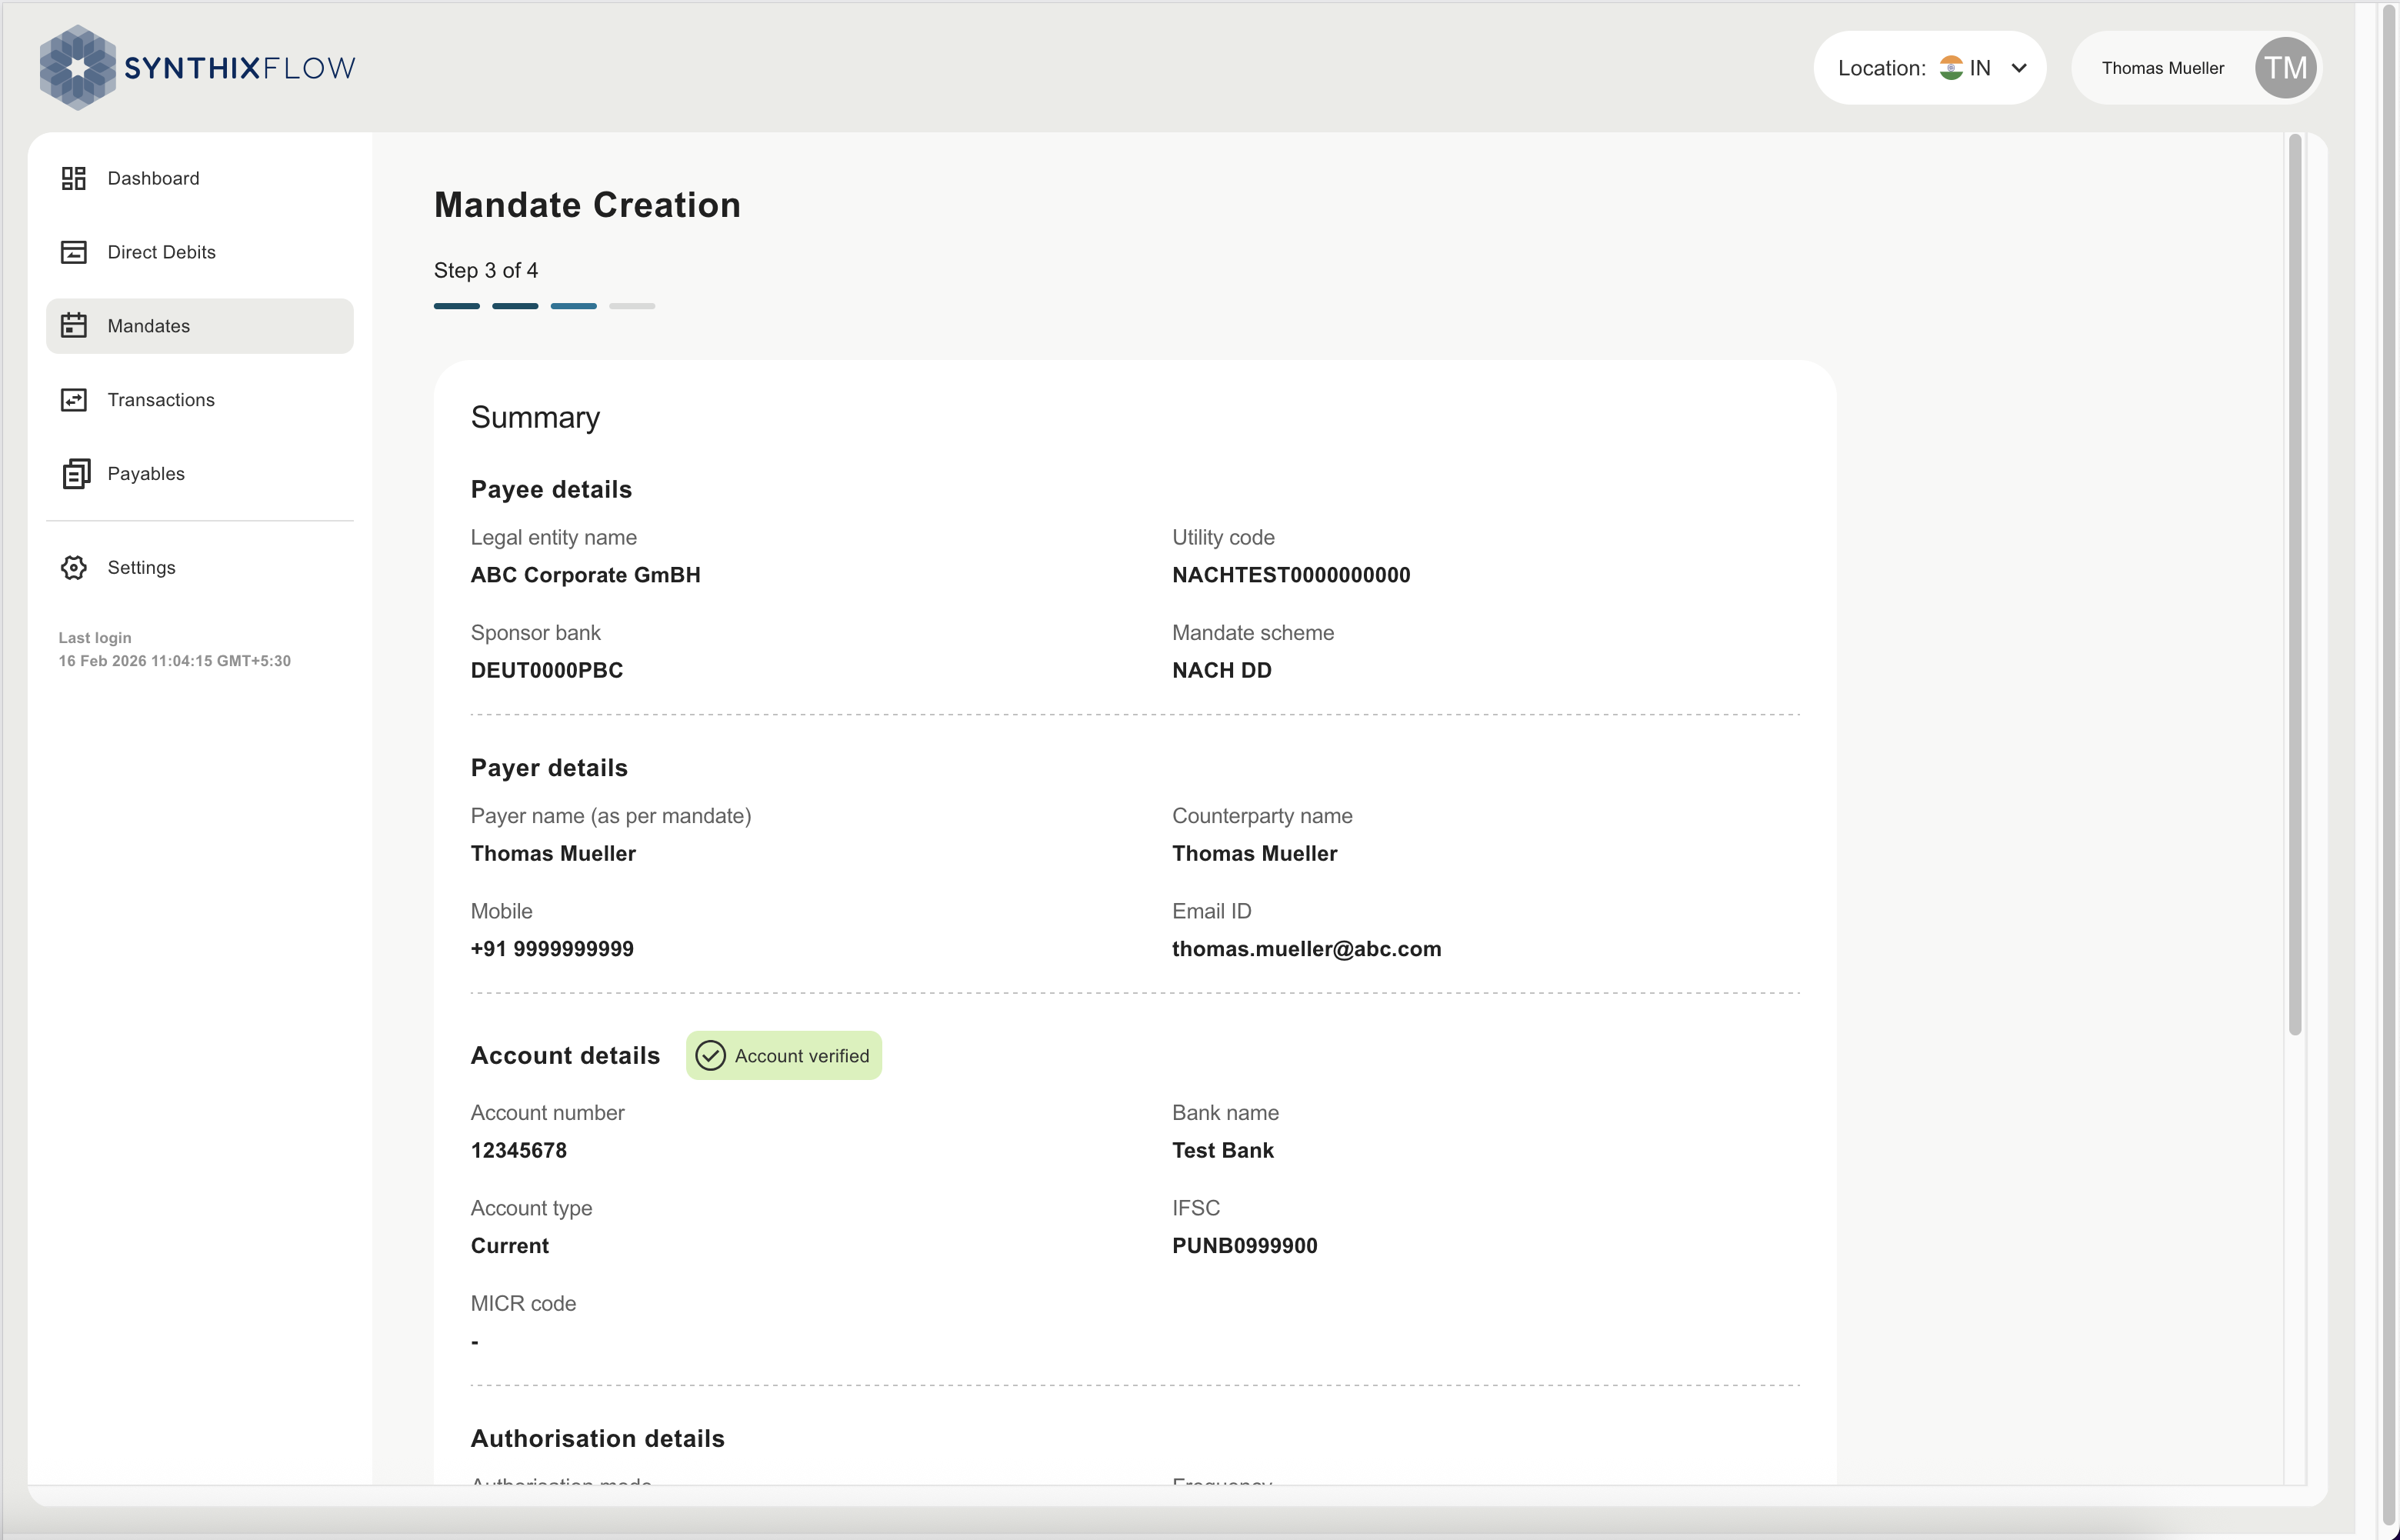
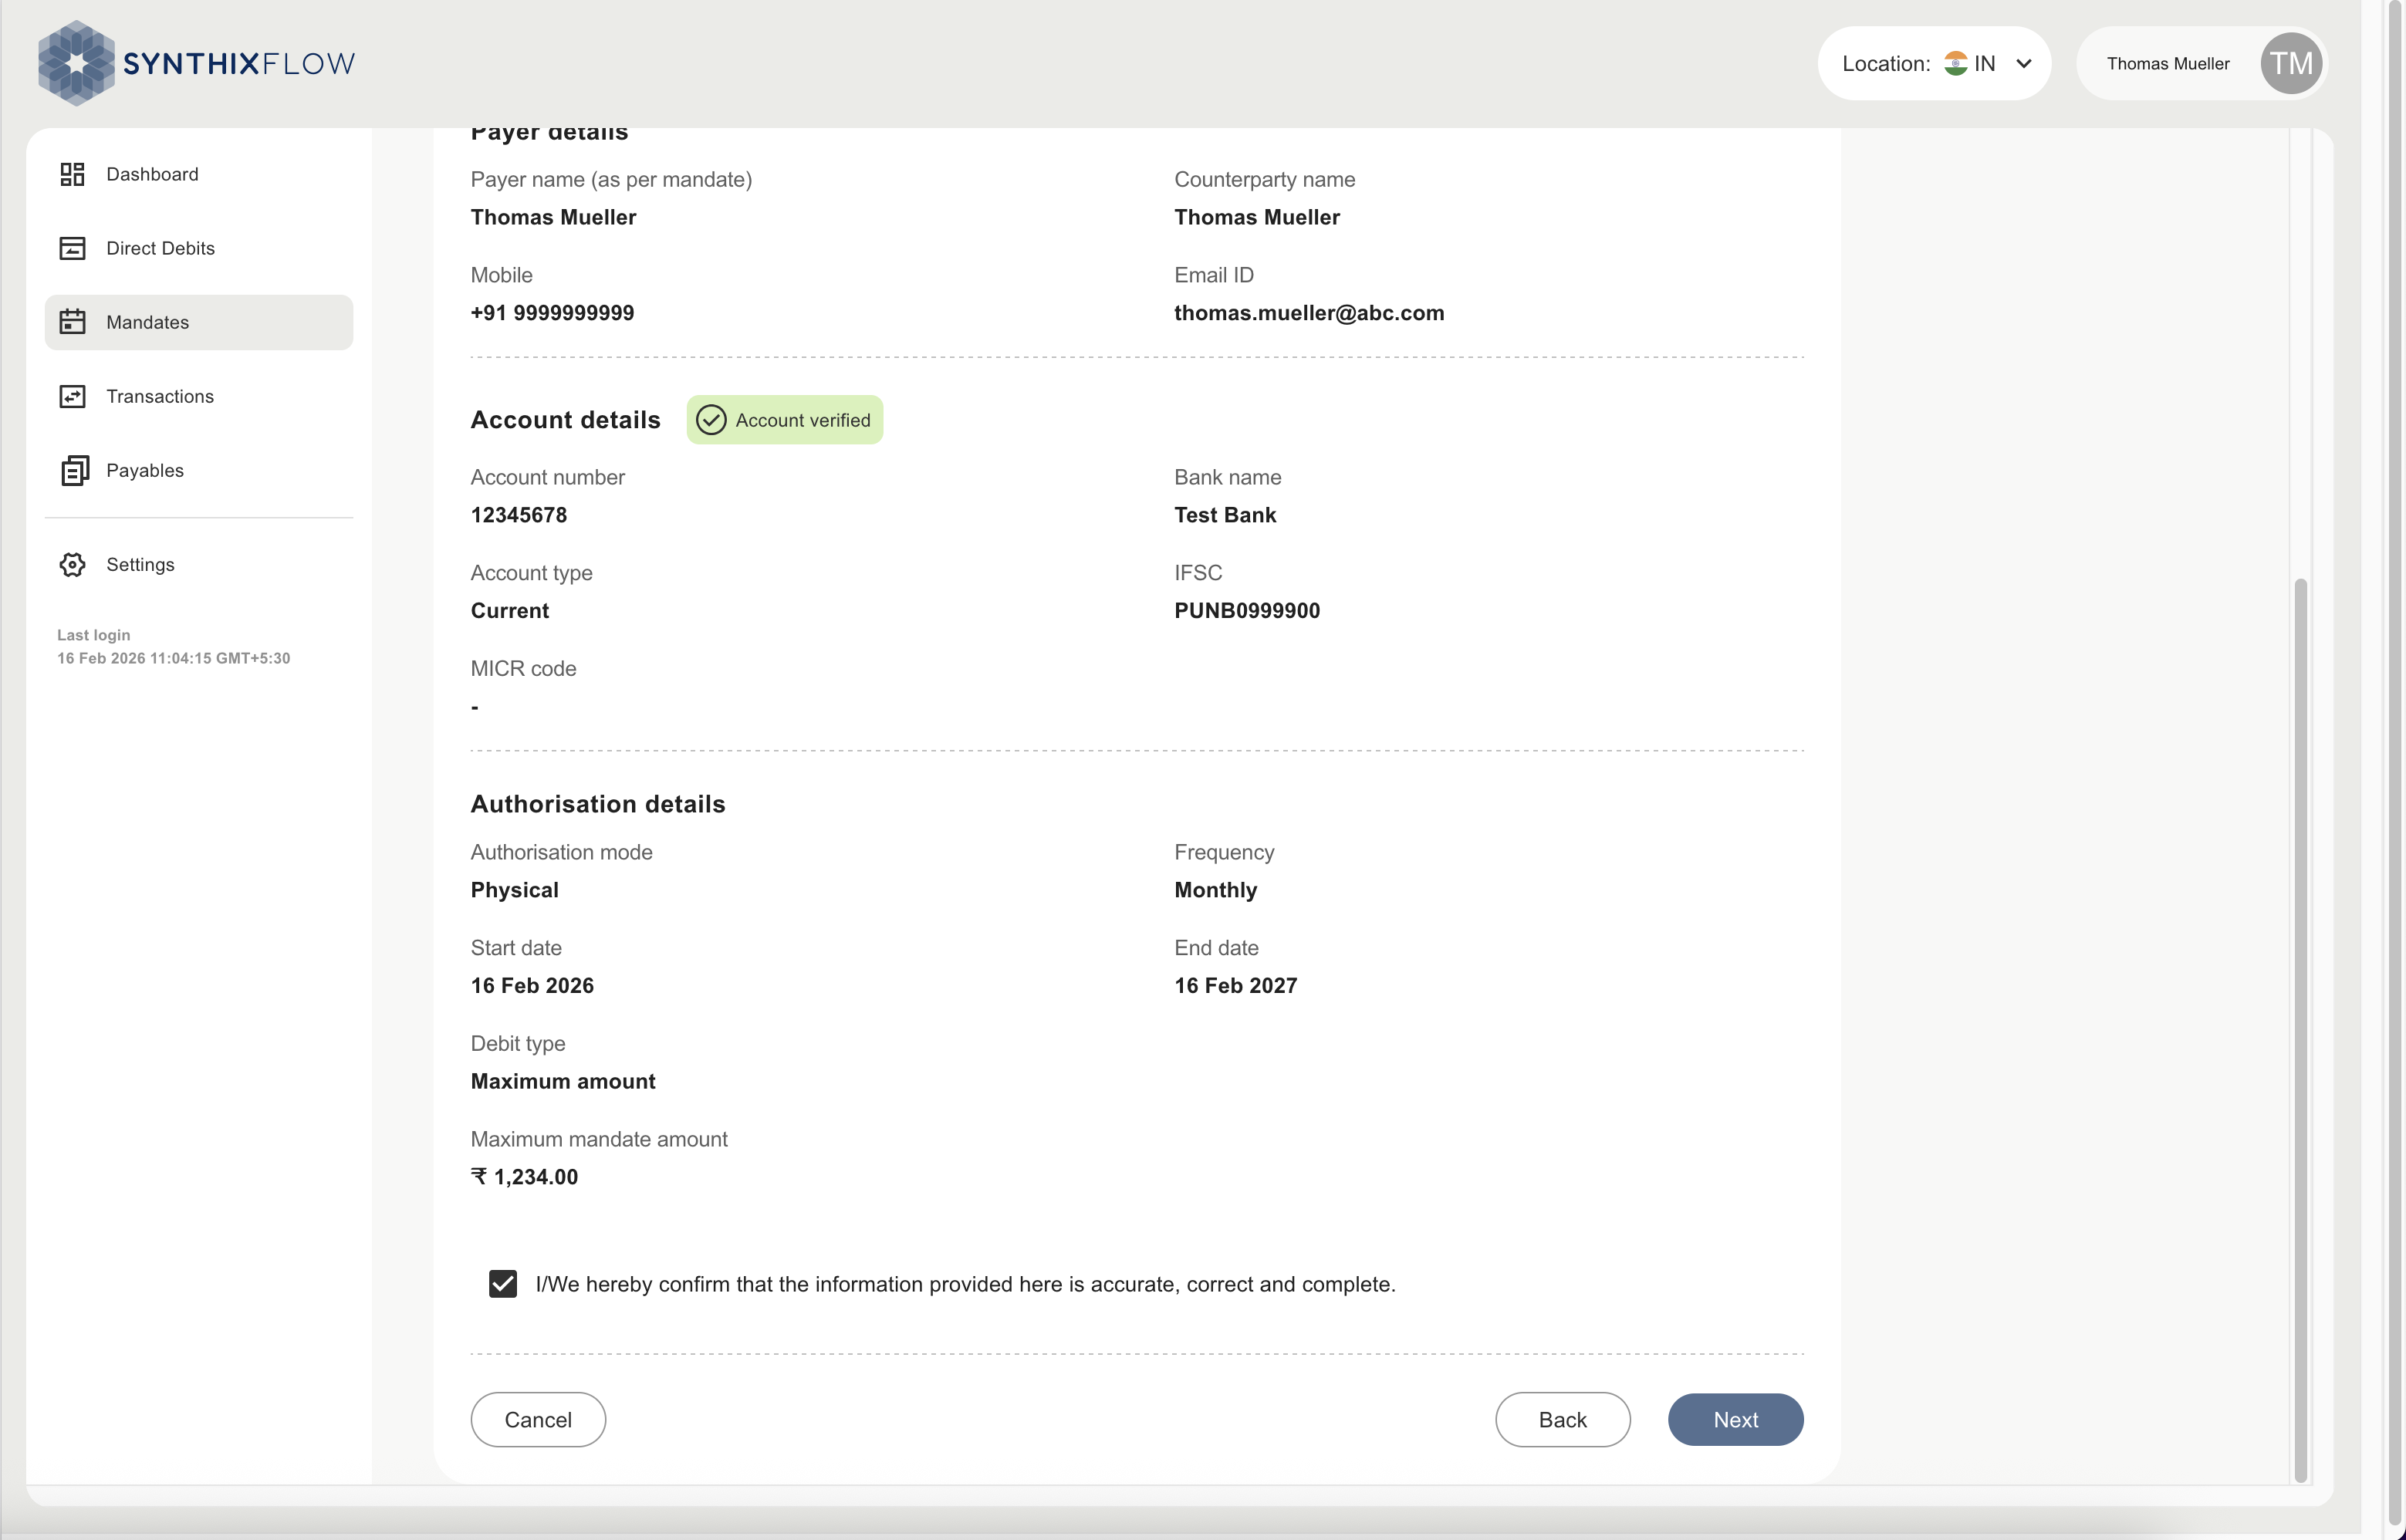
Check the summary of the mandate requested using this page.
| Payee Details | Description |
|---|---|
| Legal entity name | Name of the business entity initiating the debit instruction. |
| Sponsor bank | Bank sponsoring the NACH mandate for the payee. |
| Utility code | Unique NACH code assigned to the payee by NPCI. |
| Mandate scheme | Mandate type under which debits will occur (e.g., NACH Direct Debit). |
| Payer Details | Description |
|---|---|
| Name | Name of the counterparty authorizing the mandate. |
| Email address used for communication and mandate updates. | |
| Mobile | Mobile number used for OTPs and validation. |
| Account Details | Description |
|---|---|
| Account number (masked) | Bank account number from which funds will be debited (shown partially masked). |
| IFSC | IFSC code identifying the payer’s bank branch. |
| Bank name | Name of the payer's bank. |
| Authorization Details | Description |
|---|---|
| Debit type | Maximum debit amount or limit allowed under the mandate. |
| Frequency | How often debits can occur (e.g., Monthly, Quarterly). |
| Start/end dates | Mandate validity period defined by start and end dates. |
If all information is accurate, click Next.
Download, Sign & Upload NACH Form
This is the final step.
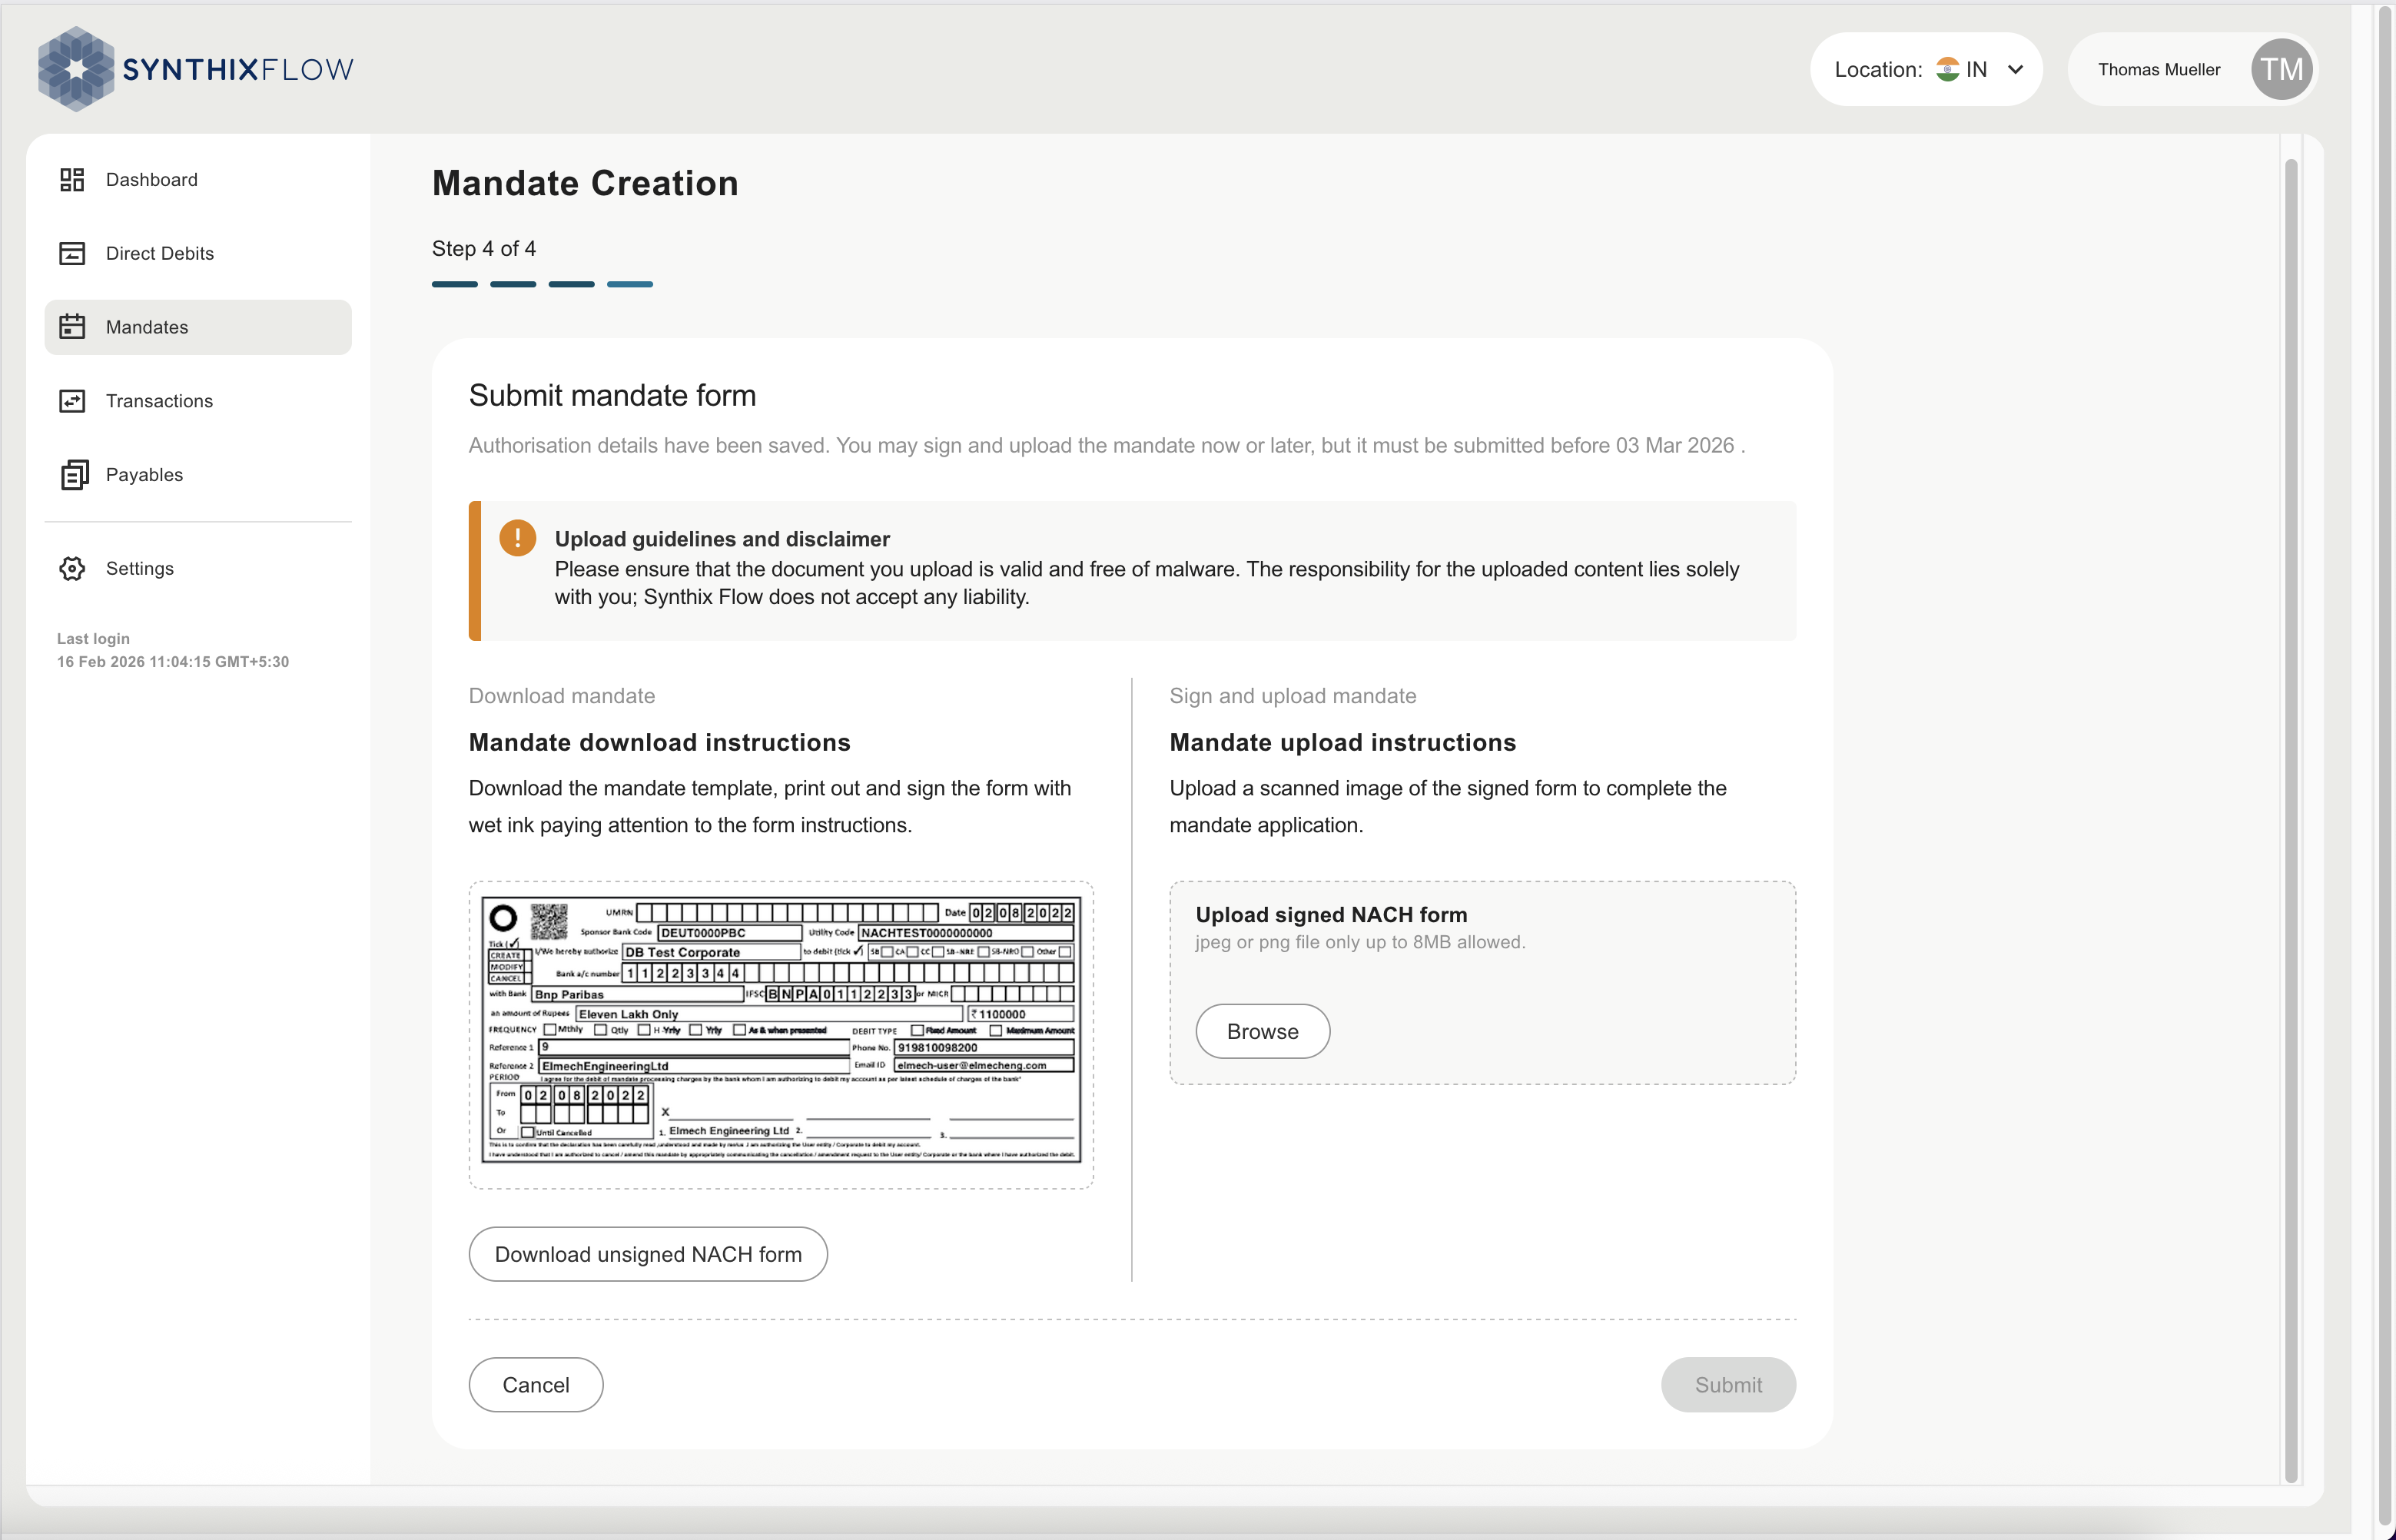
- Download the auto-filled NACH mandate PDF. This includes all payer, payee & authorization details.
- Print and sign the form (physical ink signature). The page shows a preview and instructions for printing.
- Upload the signed form, a scanned copy in JPEG, PNG, or PDF format. Use the Browse button to attach the file.
After upload, click Submit.
Mandate completion
The mandate status updates to Submitted and then to Active depending on processing rules. Clients receive an alert via their dashboard.
The counterparty can now track the mandate status through the Mandates section.